20+ Years Experience
Specialist Kitchen Renovation
Enquire Today For A Free No Obligation Quote
Did you know that a simple cabinet painting project could completely transform your outdated kitchen? If you’ve been wanting to update your kitchen but don’t have the budget for a full remodel, then cabinet painting may be the perfect solution for you. Don’t settle for a lackluster kitchen; let us show you how to achieve a stunning transformation with just a few coats of paint.
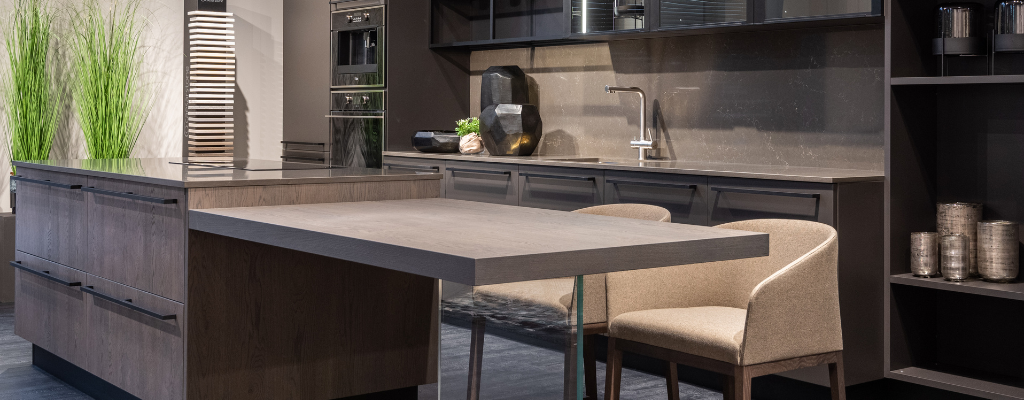
Cabinet painting is a cost-effective and eco-friendly method for revitalizing your kitchen. It consists of applying a fresh coat of paint or stain to your existing cabinets, giving them a new look without the expense of replacement. This approach is perfect for updating your kitchen without a complete renovation, providing a budget-friendly option to enhance the overall aesthetic.
If you are considering cabinet painting, select high-quality paint or stain that complements your kitchen’s style and color scheme. Additionally, thorough cleaning and proper surface preparation are crucial for a professional finish. Seek professional advice if necessary to execute the process successfully.
Are you looking to update your kitchen but don’t want to break the bank or deal with a major renovation? Consider cabinet painting as a cost-effective and efficient option. In this section, we will discuss why cabinet painting should be on your list for kitchen updates. From saving money to minimizing disruption and offering endless customization options, we’ll cover all the benefits of choosing cabinet painting for your kitchen.
Cabinet painting is a cost-effective way to give your kitchen a refreshing update. Follow these steps for a successful project:
True story: Sarah saved over $2000 by painting her kitchen cabinets, giving her kitchen a fresh and modern look on a tight budget.
If you’re considering updating your kitchen, cabinet painting may be a cost-effective and transformative option. But before you dive into the project, it’s important to understand the steps involved. In this section, we will walk through the process of cabinet painting, from preparing the cabinets for paint to adding the finishing touches. By the end, you’ll clearly understand the steps involved and can decide if cabinet painting is the right choice for your kitchen update.
When preparing cabinets for painting, it is essential to follow these steps carefully:
For optimal results, it is important to ensure the cabinets are free from any grime or grease before proceeding with the priming and painting process.
When my friend painted her kitchen cabinets, she carefully followed each step of the painting process. The result was stunning, giving her kitchen a new look and feel, all while staying within a budget-friendly approach.
When updating your kitchen, cabinet painting can be a cost-effective and transformative solution. However, with so many paint types available, choosing the right one for your cabinets can be overwhelming. This section will discuss the three main types of paint used for cabinet painting: oil-based, latex, and milk paint. By understanding the characteristics and application methods of each, you can make an informed decision on which type of paint is best suited for your kitchen update.
When using oil-based paint for cabinet painting, make sure to have proper ventilation and consider hiring a professional for a flawless application.
Pro-tip: To achieve a professional finish with latex paint, thoroughly prepare the surface and use high-quality tools and materials.
Milk paint was commonly used on farmhouses and furniture in the nineteenth century due to its natural ingredients and durable finish. It has recently experienced a resurgence in popularity as an environmentally friendly and non-toxic paint option.
Regarding updating your kitchen, one option that has gained popularity in recent years is cabinet painting. But is this method right for your specific needs and budget? This section will discuss the pros and cons of cabinet painting to help you make an informed decision. From its affordability and ease of application to its limitations and necessary preparation, we will cover all aspects of this option.
Benefits of cabinet painting include affordability, quick application, and the ability to choose custom colors. It is a cost-effective way to update your kitchen with less disruption compared to cabinet replacement. However, limited color options and less durability than refacing or replacement are important factors.
If you are looking for a quick and budget-friendly kitchen update with the flexibility to choose custom colors, consider cabinet painting. For longer-lasting solutions, you may want to explore refacing or replacement.
If you’re looking to refresh your kitchen without spending a lot of money, cabinet painting is a great way to achieve a new look without breaking the bank. Consider exploring different color options and finishes to customize your cabinets and elevate the overall aesthetic of your kitchen.
Cons of cabinet painting include:
In the late 1700s, cabinet painting became popular in Europe to revitalize furniture, with artisans using oil-based paints to achieve vibrant colors.
Did you know that when faced with limited color options for cabinet painting, you can still achieve versatility by making creative design choices?
Cabinet painting offers a cost-effective and customizable kitchen update option, but it’s not as durable as cabinet refacing or replacement. While it’s a quick and affordable solution, its durability depends on proper preparation and technique.
Fact: A well-executed cabinet painting job can extend the life of your cabinets by several years, making it a valuable option for a budget-friendly kitchen upgrade.
Did you know that cabinet painting can give your kitchen a fresh, updated look at a fraction of the cost of replacement? To achieve the best results, it is important to properly prepare and use the right techniques during the painting process.
Ans: Cabinet painting can be a great option for updating your kitchen, but it may not be the right choice for everyone. It’s important to consider your budget, timeline, and desired outcome before deciding if cabinet painting is right for you.
Ans: Cabinet painting can provide a cost-effective way to refresh the look of your kitchen without the expense and time of a full renovation. It can also allow you to change the color and style of your cabinets to match your personal taste better.
Ans: Solid wood or MDF (medium-density fiberboard) cabinets are the most suitable for painting. Cabinets made of laminate or thermofoil may not hold paint as well and may require special primers or techniques to ensure a quality finish.
Ans: The process for cabinet painting involves cleaning and prepping the cabinets, removing any hardware and doors, sanding and priming the surfaces, and then applying multiple coats of paint. It’s important to properly prepare and prime the cabinets to ensure a long-lasting finish.
Ans: While painting cabinets may seem like a simple DIY project, it can be time-consuming and intricate. Hiring a professional cabinet painter can ensure a high-quality finish and save you time and hassle. However, if you have experience and the necessary tools, it is possible to paint your cabinets yourself.
Ans: Updating your kitchen with cabinet painting can improve your home’s overall appearance and appeal, which may increase its value. However, the exact impact on your home’s value will depend on various factors, such as the quality of the paint job, the condition of your cabinets, and the current market trends in your area.

We Aim To Reply To All Enquiries With-in 24-Hours